Sew In Weave. No Closure or Leave Out
My First Sew In Weave
I never thought I would, but here I am rocking my very first sew in weave (with no closure or leave out). You guys know I love my crochet braids. I’ve been wearing crochet braids as a “workout proof” protective style for a year and a half now. I’ve enjoyed the convenience and freedom of experimenting with color, curls and length, all while protecting my natural hair underneath.
But, despite the ease and convenience of crochet braids, I’ve been drawn to the silky, natural texture of weave extensions. Weaves provide access to a whole new look and texture of hair not found with crochet braids since the silky texture prevents the interlocking required to secure crochet braids. So, after months of research and, yes many YouTube videos, I successfully installed my first sew in weave! But not without plenty mistakes and frustration. To help you avoid making those same mistakes, I share below my top take-a-ways from my first weave installation.
Installing Your First Weave – Tips & Take-a-Ways
Cut your teeth on synthetic hair. If you’re doing your weave yourself, use synthetic hair your first couple of times until you perfect your technique. To avoid the frizzing and matting traditionally characteristic of crochet hair, I chose to go with human hair for my first weave. I strongly advise against this! Human hair is expensive and even more so for the longer lengths.
It’s best to learn and perfect your weaving technique using synthetic hair before investing in more expensive human hair. Synthetic hair is much more affordable. (The Outre Batik Jerry Curl hair I’m wearing in the sew in tutorial only costs $10 a pack.) That way if you cut a track the wrong way or other mistakes you’ll inevitably make your first time out, you haven’t wasted a lot of money. Keep in mind that synthetic hair can be just a soft and pretty as human hair without all the maintenance required with human hair extensions. I actually prefer the Batik synthetic hair over the human hair I purchased at a much higher price point!
[su_frame]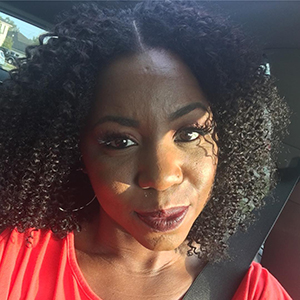 [/su_frame]
To Sew or to Glue? Do Your Research. Weave can be installed two ways, using bonding glue (quick weave) or a sew in. A simple YouTube search will show you the hair loss and damage women have suffered from improper use of bonding glue.
Because I wanted a fuller look but have shaved sides, I opted to use the bonding technique for my first weave. Big mistake! I’ll never do it again. First off, the tracks started falling out after teaching my very first fitness class! Luckily, they didn’t come all the way out until class was over. But can you imagine how embarrassing it would have been if a track fell out in the middle of class?! I also didn’t like the feel of the glue and bonding shield on my scalp and hair. It was literally suffocating. And, because the hair was glued in place, it was difficult to pull my hair back to exercise and teach my fitness classes.
- Bonding Technique (Quickweave). For the bonding technique, you first must mold your natural hair in place with gel and then apply a bonding shield to provide a protective barrier between the glue and your natural hair. Not only is this prep process time consuming, all these “protective barriers” deny your scalp the air it needs to breathe. They also prevent access to your scalp to massage or apply oils to keep your natural hair nourished and moisturized while wearing your weave. This clearly is not healthy for your hair and ultimately can lead to hair and scalp damage.
- Sew-ins on the other hand don’t have these same drawbacks. And, I had much more flexibility in styling since the tracks can rotate freely underneath the thread. As long as you don’t sew your tracks in too tightly, you shouldn’t suffer any hair or scalp damage. Just remember to give your hair a break between weave installations. Which brings me to my next tip…
[su_frame align=”right”]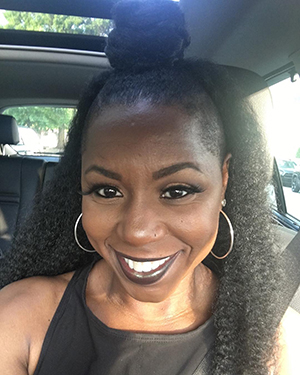 [/su_frame]
Give your hair a break between protective styles. This applies to crochet braids as well as weave extensions. If you’re old enough to remember Susan Taylor, the former editor of Essence Magazine, you probably noticed how her hairline gradually receded over the years from the gorgeous, beaded cornrow style she constantly wore.
Your scalp and hair needs a break from the tension of cornrows, even if they aren’t braided tight, to avoid traction alopecia and other hair and scalp damage.
[su_quote cite=”Wikipedia” url=”https://en.wikipedia.org/wiki/Traction_alopecia”]Traction alopecia is a form of alopecia, or gradual hair loss, caused primarily by pulling force being applied to the hair. This commonly results from the sufferer frequently wearing their hair in a particularly tight ponytail, pigtails, or braids.[/su_quote]
Every month or two, I take a break from crochet braids to relieve tension on my scalp and just to enjoy the beauty and texture of the natural hair God gave me. Not only do I find it liberating, I love running my fingers through my natural hair and love that my husband can do the same. 🙂 If you still prefer to wear extensions, braidless crochet, wigs and faux ponies are viable transitional styles between your crochet and weave installations. There’s still some tension on your scalp, but not nearly as much tension as with braids.
[su_frame]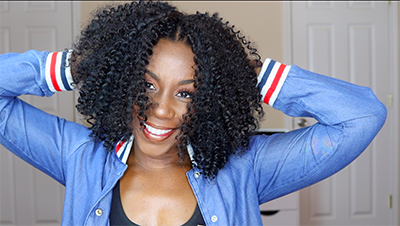 [/su_frame]
Decide on a closure technique in advance. The way you “close” your style (hide the exposed tracks) should dictate your braiding pattern and installation process for a more natural finished look.
The most common closure methods are using an actual closure piece or leaving some of your natural hair out (leave out) to blend with the extensions. Closures don’t look natural to me so I knew that wasn’t an option. Leave out looks the most natural, but requires daily maintenance to blend with your extensions.
Since I work out daily, leave out is not the most viable option for me. Instead, I chose to use the crochet method, using the weave hair itself to cover the exposed tracks along my center braids. The technique is really quite simple and works like a charm! I give a detailed demonstration in the tutorial for how to use this technique to beautifully close off your style for a natural finished look.

I sincerely hope my tips & take-a-ways from installing my first sew-in will help you in installing yours. If you have your own tips for a successful first time weave installation, we’d love to hear them! Please share them in the comments below. Each one, teach one…
[su_frame align=”center”]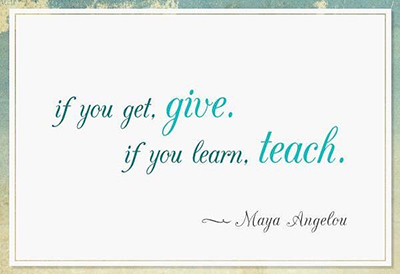 [/su_frame]
Until the next time, stay fit and fabulous my queens! Smooches…


Thanks so much! Glad you found the article helpful.
Good article, your sharing is so nice, love your work!